Table of Contents
- Why Braid Twists on a Spinning Reel (It's Not What You Think)
- What You Actually Need
- Step 1: Mono Backing (The Brake Pad Nobody Talks About)
- Step 2: The Bucket Trick (Why Water Changes Everything)
- Step 3: Line Direction (The 3-Second Check That Saves You)
- Step 4: Tension (The Goldilocks Zone)
- Step 5: After Spooling — The One-Hour Cure
- How to Tell If You Did It Right
- What About Line Twist From Fishing (Not Spooling)?
Last July I watched a guy at the boat ramp pull 40 yards of brand-new braid off his spinning reel and throw it straight in the trash.
Line was so twisted it looked like a slinky. Thirty bucks gone in thirty seconds. I walked over and asked what happened. “Spooled it myself,” he said. “First cast — birdsnest.”
He's not alone. I've fixed this exact problem for at least a dozen fishing buddies over the years, and the fix is never what they think it is.
Most people blame the line — the reel, or some mysterious “bad batch.” It's none of those things. The problem is how the line goes on.
Here's what actually causes braid twist on spinning reels — and exactly how to stop it before you waste another spool.
Why Braid Twists on a Spinning Reel (It's Not What You Think)
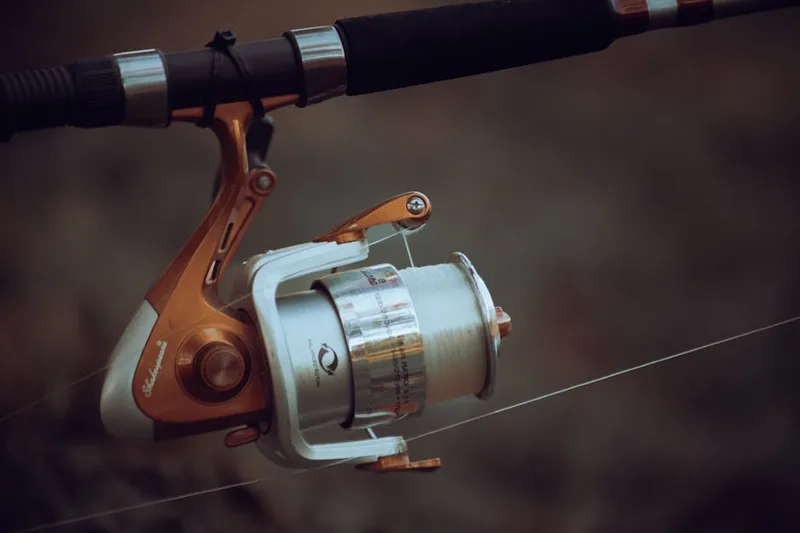
The spinning reel has a built-in design problem. The line comes off the bail and wraps around the spool at a 90-degree angle. Every rotation of the bail introduces a quarter-twist into the line.
Mono has enough “give” to absorb most of this — it untwists itself as it relaxes. Braid doesn't.
Braid has zero memory. That's usually a good thing. It means no coils, no spring-back, no annoying loops on the cast. But zero memory also means zero self-correction.
If you introduce twist during spooling, that twist stays. Forever. It compounds with every cast, every retrieve, every fish that pulls drag. After a few trips, your line looks like a phone cord from 1998.
The counterintuitive part: the direction you lay the filler spool matters more for braid than for mono. With mono, you can get away with the wrong orientation and the line will eventually relax. With braid, wrong orientation = permanent damage.
What You Actually Need
Skip the fancy spooling stations. I've used a $35 Berkley station and I've used a pencil stuck through a shoebox. Same result. Here's the minimum:
- A bucket of water. This is non-negotiable for braid. I'll explain why in a second.
- Monofilament backing. 10-15 yards of cheap mono — literally anything. I use the 8lb Stren that's been sitting in my garage since 2019.
- The braid filler spool. PowerPro, Sufix 832, Daiwa J-Braid — whatever you bought, keep it in the package for now.
- Your spinning reel. Mounted on the rod, ready to go.
- Something to hold the filler spool. A pencil through the center hole, a screwdriver, whatever lets it spin freely.
If you're using a braid-ready reel — one of those Shimano or Daiwa models with the rubber grip on the spool — you can skip the mono backing. But 90% of spinning reels aren't braid-ready, so don't assume yours is.
Step 1: Mono Backing (The Brake Pad Nobody Talks About)
Braid is slick. Put it directly on a bare aluminum spool and it'll spin like a tire on ice — the entire mass of line rotates under tension, creating twist you can't undo.
Tie 10-15 yards of mono to the spool first. Arbor knot works fine. Don't overthink this. The mono acts as a grip layer. It bites into the spool and the braid bites into the mono.
Here's the detail most guides skip: the mono backing should cover the spool lip by about an eighth of an inch. Too much backing and you'll lose braid capacity.
Too little and the braid can still slip at the edges under heavy drag.
Tie the braid to the mono with a double uni knot. Trim the tags close. Now you're ready for the part that actually matters.
Step 2: The Bucket Trick (Why Water Changes Everything)
Put the braid filler spool in a bucket of water. Label facing up. The entire spool should be submerged.
Two things happen. First, water lubricates the spool so it spins with zero resistance. No friction = no tension spikes = no twist introduced during the spooling process.
Second, wet braid lays flatter and packs tighter on the reel spool — the water lets the fibers settle instead of grabbing each other.
Dry braid tends to sit loosely on the spool surface and create layers that dig into themselves on the first cast.
This is the single most important step and almost nobody does it. Every guide video shows someone holding the filler spool between their knees or using a pencil and letting it wobble.
That's fine for mono. For braid, it's asking for trouble.
Step 3: Line Direction (The 3-Second Check That Saves You)
Here's the rule: the line must come off the filler spool in the same direction it goes onto the reel spool.
- If your reel rotates clockwise to retrieve (most spinning reels), the line should come off the filler spool counter-clockwise.
- If it comes off the wrong direction, flip the filler spool over — label down.
Here's how to test it in 3 seconds without memorizing clock directions: let the filler spool float in the bucket. Pull a few feet of line off. Does it try to curl? Flip it.
Does it lay flat and straight? Perfect. The line will tell you which way it wants to go. Listen to it.
I've watched guys spend 20 minutes measuring backing, tying perfect knots, wetting the line — and then spool it backwards. One direction error and the whole thing is ruined. You can't fix it.
You have to strip it and start over.
Step 4: Tension (The Goldilocks Zone)
Braid needs tension during spooling, but not the “pinch it as hard as you can” tension that works for mono.
Braid is thin and slick — too much pressure and the line cuts into itself on the spool.
Too little and it's loose, creating “line dig” where the top layers bury into the bottom layers on a hookset.
Run the line between your thumb and forefinger with moderate pressure — enough that you feel the line, not enough that it leaves a mark on your skin.
The line should pack firm but not tight. When you press on the spooled braid with your thumb, it should have a little give — like a firm mattress, not a brick.
Keep the line loading evenly across the spool.
If the reel is stacking line higher on the bottom or top of the spool, you've got a washer problem (add or remove a shim from the spool shaft).
But that's a reel issue, not a spooling issue.
Step 5: After Spooling — The One-Hour Cure
Once the braid is on, don't fish it immediately. I know. It's exciting. You want to go.
But fresh-spooled braid needs to settle. The line layers need to compress and the tension needs to equalize across the spool.
Tie on a 1-ounce sinker, walk out 50 yards in an open field, and reel it back in under tension. Not fighting-fish tension — just steady resistance.
This “trains” the line to the spool shape and exposes any loose spots before they turn into wind knots on the water.
Then let it sit overnight if you can. Even an hour helps. The braid will pack down naturally.
How to Tell If You Did It Right
Cast into the yard a few times. Look at the line as it comes off the spool. It should peel off straight and flat.
If you see loops forming as the line leaves the spool — any kind of spiral or corkscrew — you've got twist.
The good news: if you followed these steps, your braid will lay perfectly. The bad news: if you didn't, you can't fix twist without stripping the line and starting over.
If the cast looks clean, you're good. Go fish.
What About Line Twist From Fishing (Not Spooling)?
Different problem.
Twist from fishing comes from three sources: reeling against the drag (stop doing that), inline spinners without a swivel (add a swivel), and the spinning reel's natural line-twisting action — every time the bail spins around the spool it adds a quarter-turn of twist (use a swivel at the terminal end).
But those are topics for another article. The point here is: if your braid is twisted on day one, it was spooled wrong. Fix that first.
For more on setting up your spinning reel, see our guide on fishing leader length. For picking the right line in the first place, check out our braid vs mono vs fluorocarbon breakdown.
Sources & Industry References
- International Game Fish Association (IGFA) , Official world record authority and fishing line standards reference
- Wired2Fish , Independent fishing gear reviews and line testing data
- Tackle Warehouse , Comprehensive fishing line specs, diameter charts, and user reviews
Found This Guide Helpful?
Check out LineCalc Pro , our free fishing line calculator that recommends the perfect line for your exact setup. No guessing, no wasted money.
Try LineCalc Pro →Frequently Asked Questions
Who is this guide for?
Anglers looking to make informed decisions about fishing line selection , from beginners to experienced fishermen who want to understand the technical details behind line performance.
What's the most common mistake anglers make?
Choosing line based on price alone, or using the same line for every situation. Line diameter, material, and pound test should match your target species, water conditions, and fishing technique.
How often should I replace my fishing line?
Monofilament: every season or after 8-12 trips. Fluorocarbon: every 2 seasons. Braided line: can last 2-3 seasons if properly maintained. Replace immediately if you see fraying, discoloration, or memory coils.
Braid vs Mono vs Fluorocarbon , which should I pick?
Braid for sensitivity, casting distance, and heavy cover. Mono for topwater lures, stretch forgiveness, and budget. Fluorocarbon for clear water, leader material, and abrasion resistance. Most anglers use a combination.
What pound test line should I use?
Match to your target species: 4-8lb for panfish, 8-12lb for bass, 15-30lb for catfish/striper, 30-65lb for musky/saltwater. Check your rod's line rating , it's printed on the blank for a reason.
What should beginners check before buying line?
1) Match line weight to your rod rating. 2) For spinning reels, stick to 8-12lb to avoid wind knots. 3) Don't overspend on your first spool , $8-15 mono is perfectly fine to learn on.